I love rainbows, it is so realistic but seemingly surrealistic. The rainbow is transient and may disappear at the same time when you realize you should take a picture with it. Never mind, you will learn how to put a rainbow over your picture here. We don’t need to use Adobe Photoshop to add a rainbow image layer and repeat the masking to get a seamless look, we have a much easier way to do this.
About Add Rainbow to Photo Online Free
If you are reading my blogs, you will find I will cover online free solutions in all my topics. However, I am not going to continue on this top. Why?
Most online free photo editor offers rainbow filters only, not adds a real rainbow to your photo. Even if it adds a rainbow, it doesn’t look natural, the rainbow cannot fit into your picture. Therefore, we talk about the easiest method only.
The Easiest Way to Add Realistic Rainbow to Photo without Photoshop
I do use Adobe Photoshop, but every time I am assigned with a new photo editing task, I need to check many tutorial articles and videos to get a satisfied work. I was so desperate for a tool that can do photo editing as professional as Adobe Photoshop but take less time on fine tuning. Now, I find it—Luminar AI.
Luminar AI is an AI powered photo editor, highly sharp on content aware, it suggests the best templates for you to enhance the image quality automatically, it sets up all photo editing process with optimized effects. It is pleasingly fast and beautiful, you will enjoy working with it.
It has macOS and Windows version.
Luminar AI Standout Features
- Edit raw and common images
- AI-powered, suggest the best style for your photo
- 4 types of editing tools: Essential (basic), creative (replace sky), portrait touch-up (change eye color) and professional editing modes (clone & stamp)
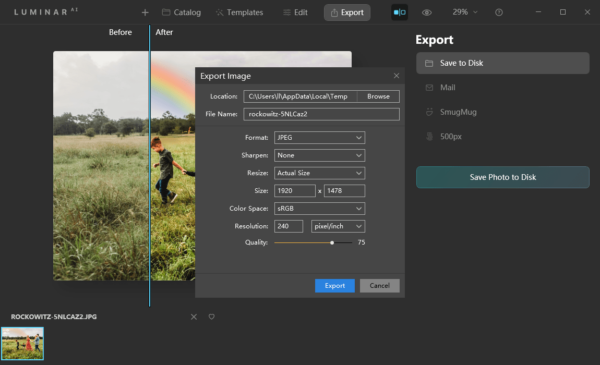
- Export photos as JPEG, PNG, TIFF, PSD, PDF
- Share photos to Mail, Smugmug, 500px
- Batch process photos
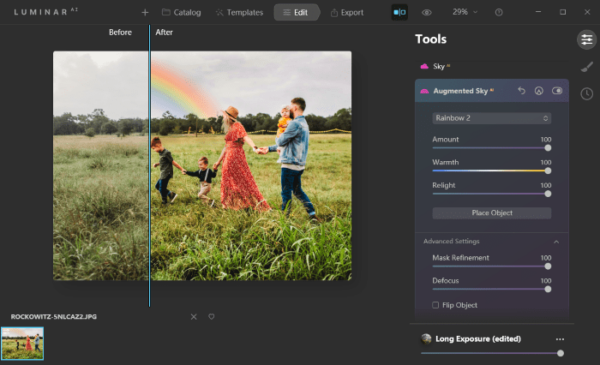
- Before After view
How to Add Realistic Rainbow to Photo Easily?
- Grab the installer of Luminar AI from Skylum website, install and open the program.
- Click the + button to add a photo to Luminar AI.
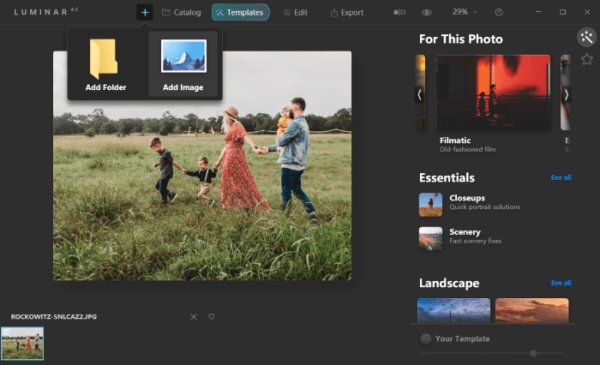
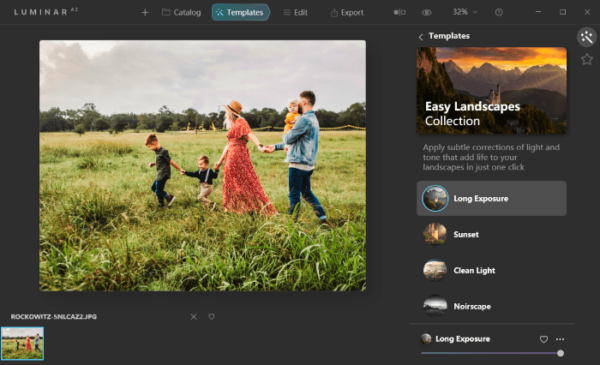
- In the Templates interface, choose a suggested style to improve your photo first.
- Then head to Edit>Creative>Augmented Sky.
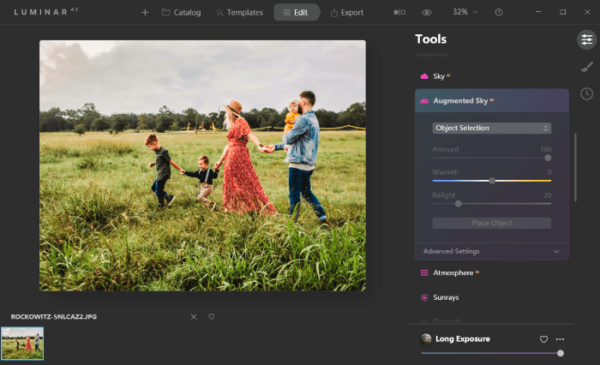
- Choose a Rainbow template from the Object Selection, click Place Object to add a realistic rainbow.
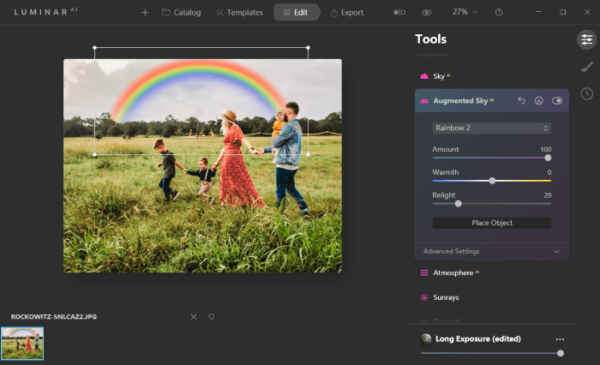
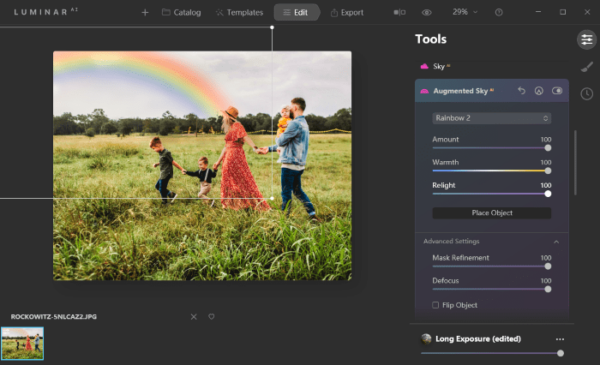
- Move the sliders to adjust warmth, relight, effect amount, also you can go to Advanced Settings for detailed controls.
- Check Before and After result.
- Click on Export button, save to Disk or share online.