Have you tried Skylum photo tools? Amazing, right? The newly released Luminar AI will surprise you too. I have installed Luminar AI on my Windows and feel excited to share ANYTHING about this tool with you, and this is how this review comes out.
Hope at the end of this review, you will make a smarter decision between Luminar 4 and Luminar AI. Now, let’s get started.
- What is Luminar AI?
- Luminar AI Review
- What’s The Difference between Luminar AI and Luminar 4?
- Is Luminar AI Worth It?
What is Luminar AI?
Luminar AI is an Artificial-Intelligence powered photo editing tool. For a better understanding, we can put it this way, Photoshop polishes photos with its powerful yet complicated layer functionality, luminar 4 edits photos with the same excellent effects as Photoshop but is much easier to grasp, while Luminar AI works as good as Luminar 4 but its content-aware power just suggest and bring the best to your photo. Most of the time, you just need to make a selection from the list, then apply onto your photos.
What Luminar AI Offers?
- AI-powered, content aware, suggest the best style for your photo
- Edit raw and common images
- Essential, creative, portrait and professional editing modes
- Offer and suggest templates for your photos
- Basic editing tools
- Export photos as JPEG, PNG, TIFF, PSD, PDF
- Share photos to Mail, Smugmug, 500px
Luminar AI Review
Installation
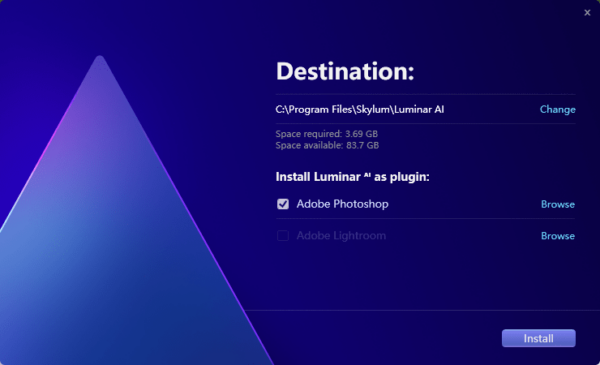
Luminar AI takes about 3.7GB on my Windows PC, you can install this tool as standalone program or install as plugin in Adobe Photoshop or Lightroom. The installation, surely, takes time but it won’t be stuck or crash of a sudden.
UI
Luminar AI has a different UI from Luminar 4, the UI is a big difference between these two.
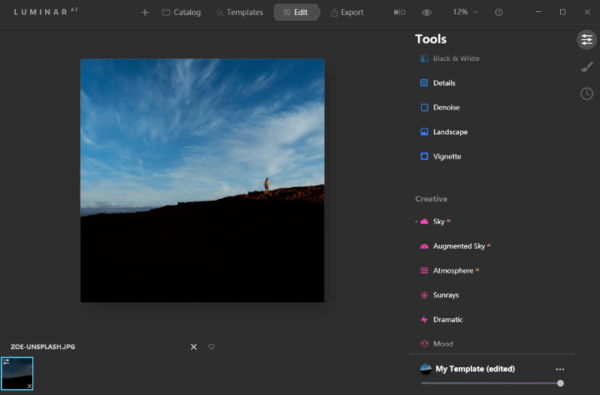
It uses a new UI to match the new workflow, 4 major toolbars are located horizontally on the top of the interface, all tools under each toolbar are displayed vertically on the right side, and the left 70% space of the interface is for photo preview
The frame, the design, the layout, the color, every detail of the UI is so beautiful and pleasing to the eye, it is neat and you can find the tools quickly and start your workflow efficiently.
The icon of each tool is modern, adorable. The color for tools under different editing mode is consistent, and I like this part very much. Luminar is beautiful, but Luminar AI is the one extending its beauty in all details.
Editing Tools
There are 4 editing modes in Luminar AI too: Essential, Creative, Portrait, Professional. All the tools are put in the same place: Edit>Tools. The order is fixed, from Essential to Creative to Portrait to Professional.
Essentials
Essentials editing mode offers all basic tools you will need for photo editing, you can easily manipulate the color and light, also use AI enhancer for instant yet awesome improvements.
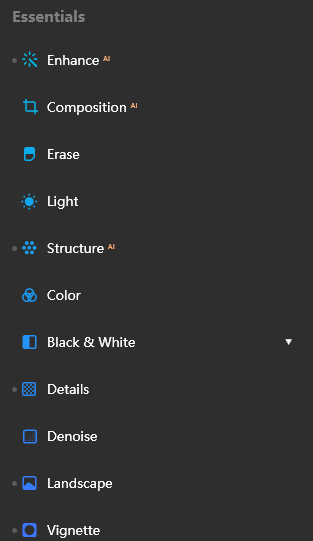
- Enhance (AI Powered): the sky enhancer allows instant sky changes
- Composition AI Powered): adjust ratio, perspective, rotate and flip, transform to 3D
- Erase: remove unwanted objects or part
- Light: adjust temperature, tint, exposure, contrast, highlight, shadows
- Structure (AI Powered)
- Color: adjust saturation, vibrance and remove color cast
- Black & White: convert to B&W, adjust luminance and saturation
- Details enhancer
- Denoise: denoise luminosity and color
- Landscape enhancer: dehaze, golden hour and foliage enhancer
- Vignette
Creative
Creative editing mode is where Luminar AI shines brightest, its one-of-a-kind AI tools inform our vision that creative photo editing can be so easy, without repeated manual masking and layers.
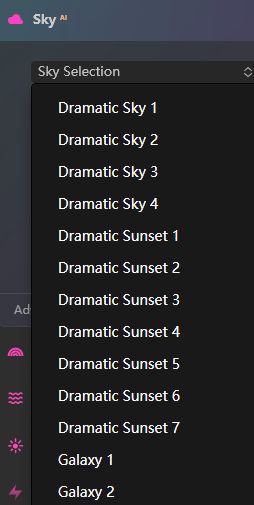
- Sky AI: you can choose a sky template, then replace the sky in your original photo with a seamless look, the new sky blends and matches with your photo perfectly. Also, you can load your own sky image as the template and replace.
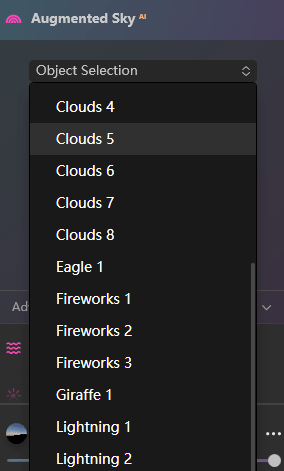
- Augmented Sky AI: you can add objects like cloud, bird, moon, firework, etc to your photo.
- Atmosphere AI: add fog, mist or haze to your photos to make your photos different.
- Sunrays: add sunray to your photo.
- Dramatic: create dramatic photos by adjusting the brightness, saturation and contrast.
- Mood: photos under different moods express different emotion and feeling, Luminar AI offers dozens of moods to express ourselves.
- Toning: adjust shadows and highlights for a wanted toning.
- Matte, Mystical, Glow, Film Grain: add special effects to photos.
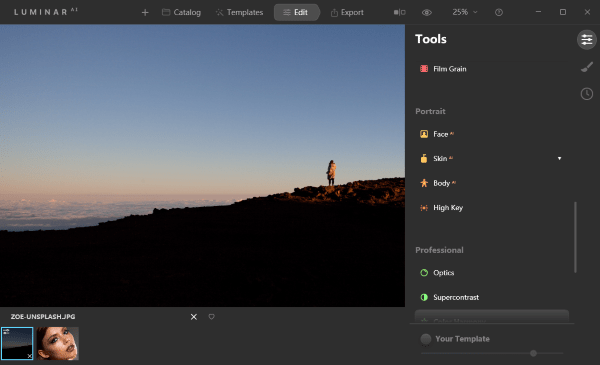
Portrait
Retouching in Luminar AI is easy and awesome, its content-aware feature makes a perfect AI.
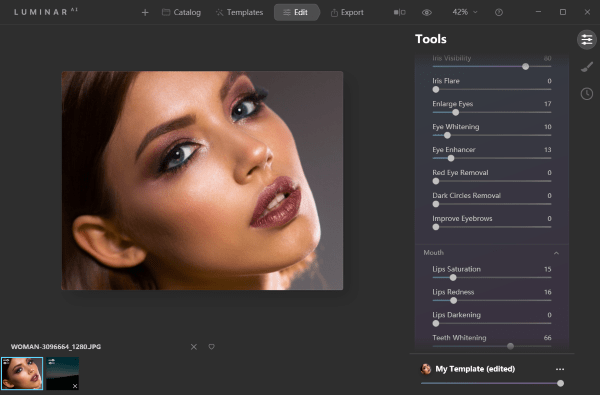
- AI Face: adjust face light, make your face slime. Also retouch your eyes and mouth.
- AI Skin: remove shine and skin defects.
- AI Body: adjust shape, abdomen.
- High Key: standard, dynamic high key
Professional
Professional editing modes is designed for advanced photo editing, to handle photos in detail.
- Optics: defringe, devignette
- Supercontrast: highlights contrast, midtones contrast, shadow contrast
- Color Harmony: color contrast, split color warmth, color balance
- Dodge & Burn: lighten, darken and erase objects
- Clone & Stamp: clone to remove unwanted objects
Templates
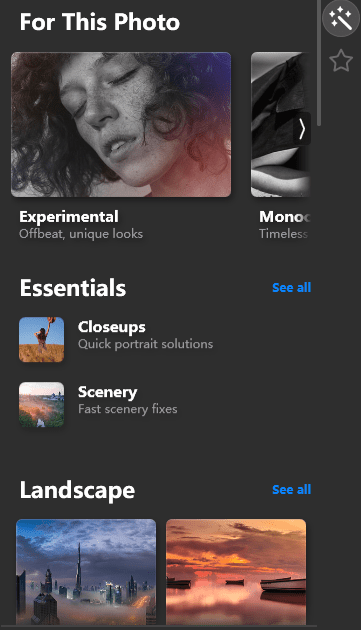
Luminar AI offers 8 categories of templates: Essentials, Mother Nature, Marco, Lifestyle, Landscape, Portrait, Cinematic and Aerial, it will suggest the best templates for your photo on the top of the template panel. That’s to say, even without using those editing tools, you can use the templates to enhance your photos easily and smartly.
Local Masking
A new tool in Luminar AI, but is a similar tool to layer editing in Luminar 4, used for layer multiple adjustments. There are 3 types of masks:
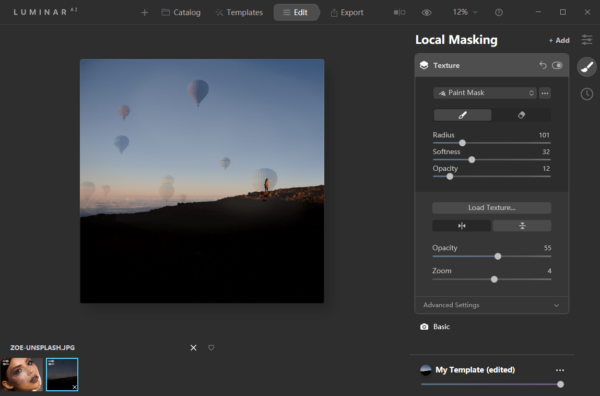
- Paint Mask: mask an image
- Radial Mask: mask an elliptical area of the photo
- Gradient Mask: create a gradual blend
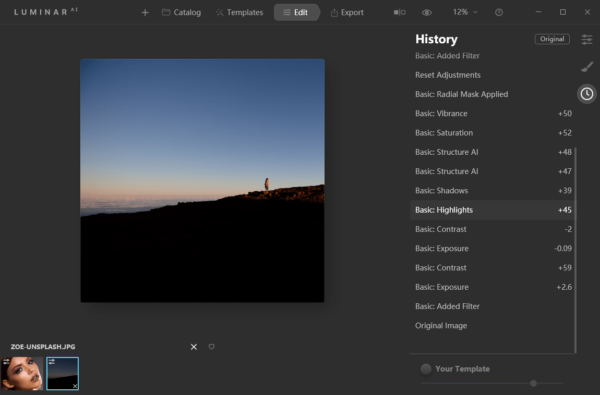
History
Luminar AI keeps records of all edits in the History panel, you can revert to a historical editing. Also, you can reset all adjustment and get back to the original.
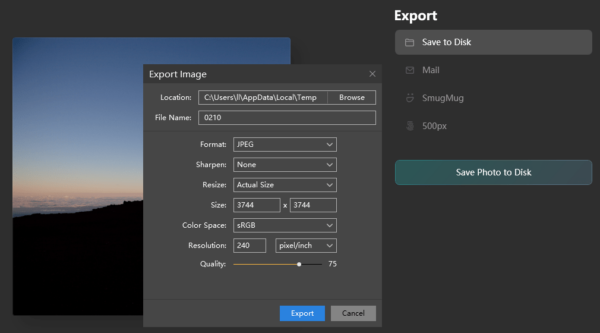
Export and Share
Now, you cannot export your processed photos to a disk, but also share to Mail, SmugMug or 500px. The export format includes JPEG, PNG, TIFF, PSD, PDF. When exporting, you can sharpen, resize, rename photos.
What’s the Difference between Luminar AI and Luminar 4?
After a closer look at Luminar AI and Luminar 4, I found there is no big difference between Luminar AI feature and Luminar 4 feature, basically all the features of Luminar 4 are inherited in Luminar AI, but there is a great improvement on UI and performance in Luminar AI.
- User Interface
Luminar AI has a neat interface, I am a great fan of its new interface design, the color themes, little icons and the layout are more pleasing and reasonable. Editing tools under 4 modes are put in the same place, you just need to pick from the list and drag the sliders to do adjustments, then apply to your photos.
There is more space to display your photos in Luminar AI, since the thumbnails of imported photos are displayed horizontally at the bottom of the interface, while Luminar 4 shows the thumbnails vertically on the left side of its interface, which divides the interface into 3 parts and therefore narrows down the space to display an imported photo.
In one sentence, the Luminar AI interface and controls take little getting used to, users will be able to master this tool quickly.
- Responsiveness
Luminar AI responds even faster.
Luminar AI launches fast, initial imports are quick too, the whole browsing and editing is as swift as you expect, that’s really good.
All the changes, like add effects, change templates, adjust parameters, etc, take effect in real time, you won’t need to wait an inordinate amount of time for a processing.
In addition, the “Luminar AI” logo on the top left of Luminar AI interface will indicate the process status.
- AI Power
Luminar 4 has a more powerful AI, the sky replacement can be seamless and perfect, the portrait editing works brilliantly, it finds facial features accurately and gives you the ability to manipulate easily but professional in every detail.
Even the templates, you will be suggested with the best ones to create a wanted photos, it just does everything behind the interface and gives you the best result.
Summary of Differences between Luminar AI and Luminar 4
| UI | Responsiveness | AI Power | Template (Looks) | |
|---|---|---|---|---|
| Luminar AI | Neat, stylish icons, 2 vertically located parts (import photo view, tools panel) , all editing tools under the same tab | Extremely fast | Smart and accurate | 8 categories |
| Luminar 4 | Distractive, 3 vertically located parts (photo thumbnail, imported photo view, tools panel), editing tools under 4 tabs | Fast | Smart | 7 categories |
Is Luminar AI Worth It?
Yes, of course.
I know little about layer editing, but I can do a good job in Luminar AI. All I need to do is select a template and drag the sliders, I can do, redo and undo anytime by tracking the history. It doesn’t offer enormous amount of tools as Adobe Photoshop, Lightroom or others, but it offers all the tools for easy and advanced photo editing, all the features are on the table, not hidden away. Still, it offers tutorials on the Welcome panel, via PDF manual and YouTube videos, you can use it like an expert in a short time.