Light means a lot to a portrait photo. There might be underexposure or shadow over that face and make it obscure, and facial features on a darken face might destroy the overall appearance of the photo. If you want to make the face in a dark face brighter, we have 3 ways to brighten face in a photo naturally and pleasingly without Adobe Photoshop, even online free.
Write before the steps
While taking a lot of time to find a tool online to brighten face in a photo, we realize we don’t have many choices, though AI and web tools are changing the games quite a lot. It is indeed that we can find a wealth of online tools to enhance the brightness of a photo, but most of them are designed to make the whole image brighter, which will make some other parts to be of overexposure and look weird.
Anyway, we did the research and tested, brightening face in a photo can be easier than you think.
1st, AI brighten face in photo easily
Brightening face in a photo doesn’t mean increase the brightness of the whole photo, this may make your portrait photo weird. To brighten face in photo and doesn’t impact the rest of the photo, AI technique from an image editor can make it easily and elegantly. Luminar Neo is the best brighten face app for Mac and Windows.
Luminar Neo is an AI powered image editor to touch up various genres of photos in common and raw formats. It suggests the best style for your photo and enhance with one click. There are 4 types of editing tools offered to you to precisely control every detail of your photos. It supports processing photos in batches.
Luminar Neo Standout Features
- AI powered, easy to use
- Support common (jpeg, png, tiff, heic), PSD and raw images
- Built-in style template for quick enhancement
- Editing tools: Essential, Creative, Portrait and Professional
- Support layer editing
- Convert image to JPEG, PNG, TIFF, PDF and PSD
- Save image to drive, share image to Mail, Smugmug, 500px
- Before/After preview
- Rest adjustment to restore original photo
How to brighten face in photo easily without Adobe Photoshop?
- Grab a free copy of Luminar Neo, install and open the app.
- Click + to add single image or add a folder.
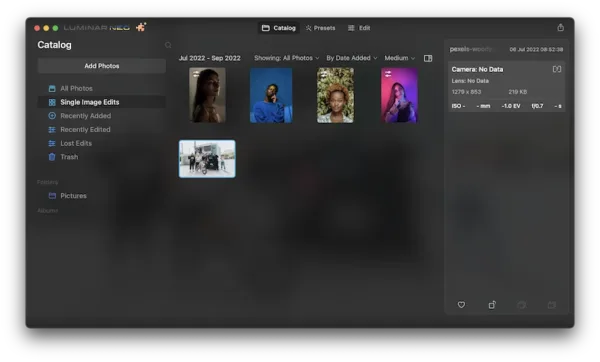
- Hover to Presets tab, choose a suggested style for your photo for enhancement, this is optional.
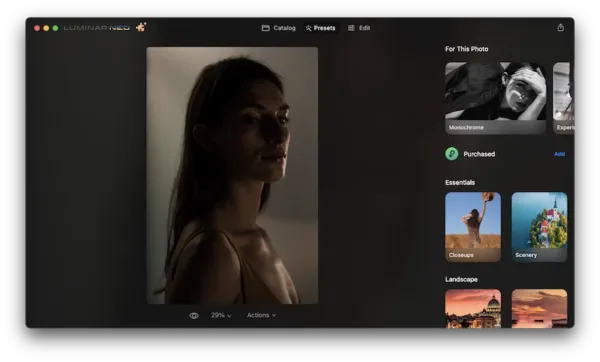
- Hover to Edit>Portrait>Face>Face Light, move the slider to adjust the lighting and check the before/after result.
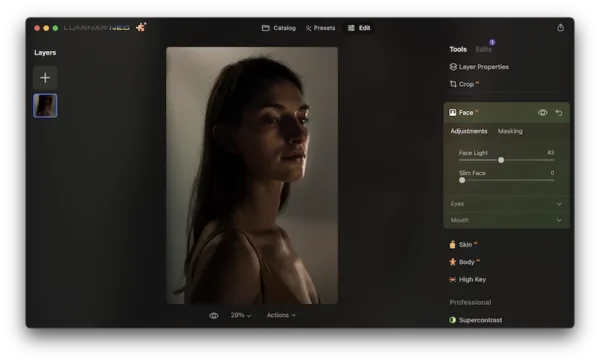
- Go to Export, save the brightened face photo to your disk or share, don’t forget to choose image output format and other settings.
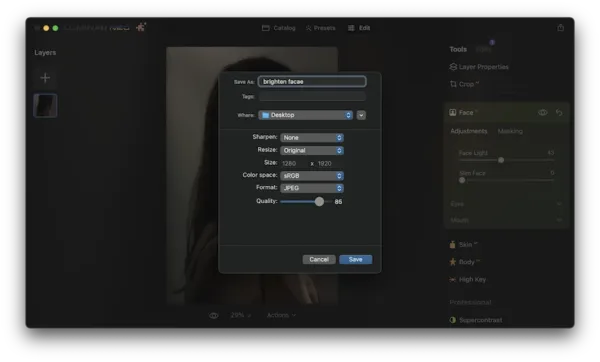
2nd, Brighten face only in photo online free
As we found, most of the online free image editors can brighten the whole image only, not just lightening up your face area, the rest part of your photo becomes a little unnatural. But there is an exception.
Here we use PicMonkey to brighten face areas. Actually, it doesn’t offer the face lighting tool, but you can use its Eye Brighten tool to achieve your purpose. You cannot brighten face in PicMonkey at one go, you have to adjust the brush size and brightness again and again until it presents you a satisfied look.
- Navigate to picmonkey.com in your web browser, sign up and login in.
- Click Add image to upload your photo.
- Hover to Touch Up > Eyes > Eye Brighten.
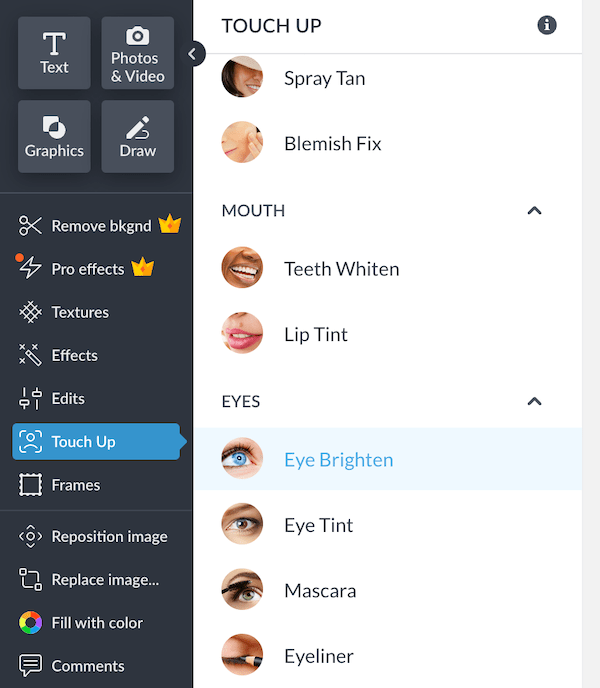
- Adjust the brush size to fit the face in your photo and move the slider to choose Lighten effect, repeat this process until the whole face is brightened in a natural way.
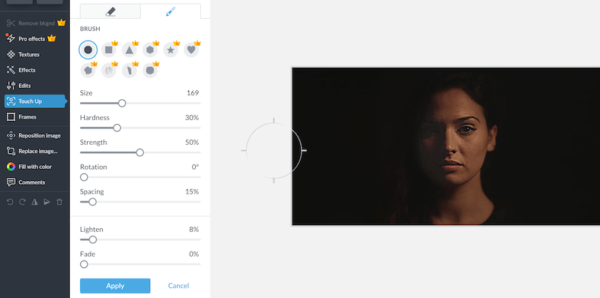
- Click Apply to save the effect.
- Click Download icon to save the photo to your disk.
3rd, Brighten whole image online free
If you opt out brighten the whole image, here we will use fotor image editor to increase brightness of the face in a photo, that means brightening with fotor will brightness to the whole image and the rest parts of your image may become too light.
- Navigate to fotor.com in your web browser, sign up and login in.
- Click Open to upload the image.
- Hover to Adjust > Basic Adjust > Brightness.
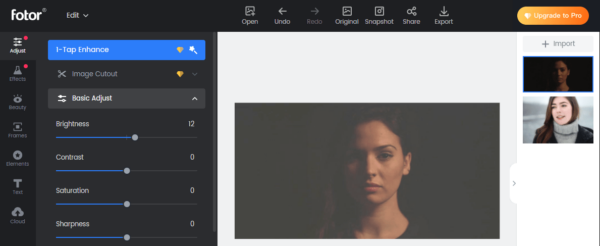
- Move the slider to increase brightness, also adjust the contrast, saturation or sharpness to make the whole image look as natural as possible.
- Hover to Export and save your image with face brightened.
Bonus: what if you prefer to brighten face in Photoshop
If you have Adobe Photoshop, or have decided to buy one, you can brighten face in photo with it too. Here I have tried to list the steps as easy as I can, if you still cannot follow and brighten your photos, check out the video at the end of this part.
- Open the photo in Adobe Photoshop.
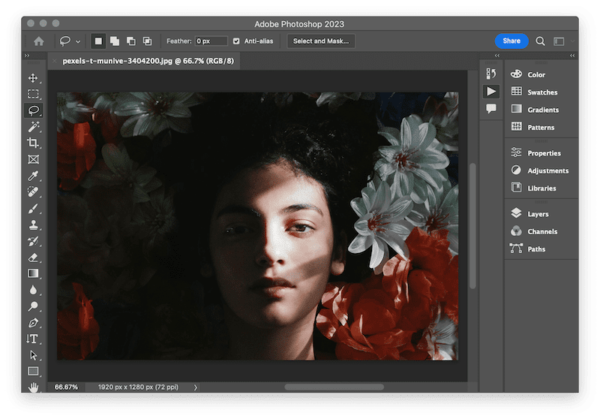
- Head to the selection tool and choose Elliptical Marquee. Then drag your mouse to select the face that you want to make brighter.
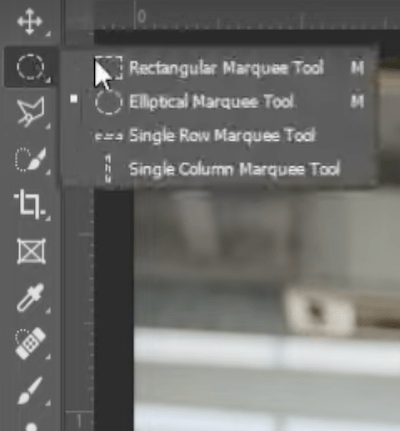
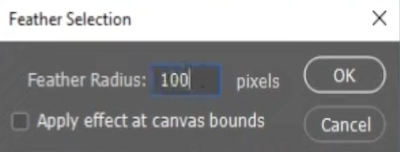
- Head to Select > Modify > Expand, set the feature radius, here we type 100, and you can adjust until you are happy with the result.
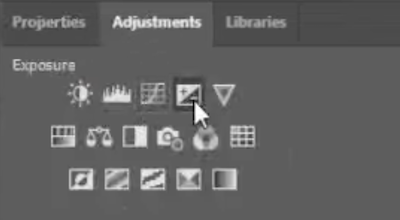
- Head to Adjustment and select Exposure.
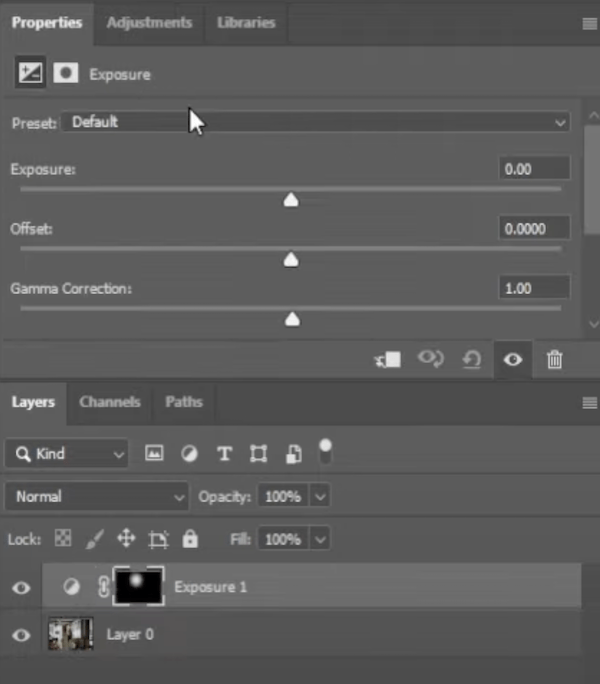
- Then move the slider to change the exposure and brighten the face in your photo.
watch video to brighten face in Photoshop:
Final Words
It is obvious that there are a lot of resources available for individuals and professionals to brighten face in a photo. These tools can be accessed in a web browser or run efficiently on a machine to power with AI. Whichever you choose, it is easy.
