Photos carry our memories and is also a good way to express our mood in a new light. You must have taken and stored at least hundreds of photos on your device, but not all of them are perfect, right? You need to edit those photos sometimes.
Are you looking for a fabulous photo editing tool? Have you ever heard about Luminar 4 or you are just hesitated to subscribe it even though it has won big applause from users across different fields? For this, we are giving the Luminar 4 Review here and answering if Luminar 4 is a better choice than Adobe Lightroom.
What is Luminar 4?
For users who are recommended to Luminar 4 but have never tried the free trial version before, a little background knowledge about Luminar is needed.
Luminar is a photo editing tool for both Windows and MacOS, its latest version comes to Luminar 4. It is more than just a standalone program, it can be added to other photo editing programs as a plugin too, including macOS Photos, Adobe Photoshop, Adobe Lightroom, etc.
It is created to edit various photos, including Raw files, from basics to Pro. There are different editing modes offered to edit travel, landscape, portraits and other photo genres. Also, you are allowed to edit the photo with Canvas tools or transfer to layers & edit the layers. Its AI technologies makes it extremely easy to enhance photos smartly, in the same time, it offers professional tools for details enhancement as your photo skills upgrade, just like the way professionals edit a photo in Adobe Photoshop or Lightroom.
Luminar 4 Features:
- Support editing Raw and different formats of photos
- AI enhance photos
- Create and browse photo library
- Offer Essential/Creative/Portrait and Pro editing modes
- Edit photos with Canvas to correct distortions, recompose photo or remove unwanted objects (remove person, remove watermark, remove date stamp, etc)
- Transfer photo to layers and create & manage the layers
- Offer Luminar effects for different photo genres
- Crop, rotate, flip, zoom photos
- Share photos to Mail or social media accounts
- Export photos as major file formats
- Batch process (apply Luminar look, rename, resize, export, etc.)
- Before & After Preview
Luminar 4 Review 2021
Install
Luminar offers both Windows and macOS versions, you can install this program to your Windows PC or Mac, even install Luminar 4 as plugin into Adobe Photoshop, Elements or Lightroom.
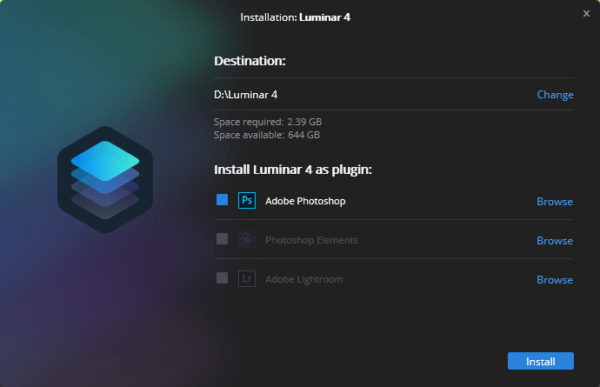
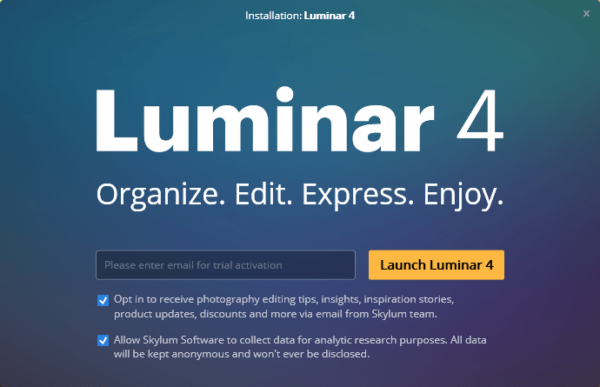
The installation process goes easy, after downloading the free trial from Luminar website, you can click and install the program, follow the instructions to enter email address and Accept the Licensing agreement. However, you have to be patient, since the installation of Luminar takes long time. The installation on my Windows PC took about 26 minutes, I am not sure if it was the reason that my anti-virus program stopped and slowed down the process or it just needed such a long time since the program just takes 2.39GB away from your storage space.
Interface
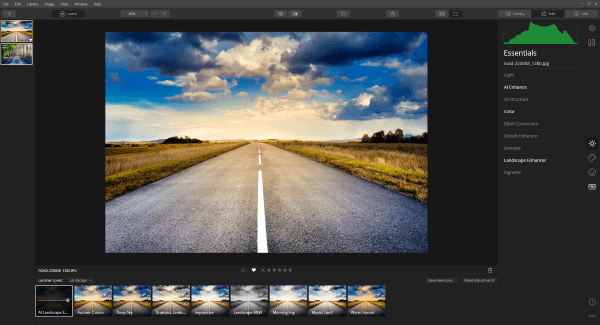
Luminar has a neat interface: imported photo in the middle, photo thumbnails on the left, editing tools on the right and Luminar Looks (effects) at the bottom.
All the functions are easy to activate by simply clicking on the buttons. With Luminar, what you see is what you get.
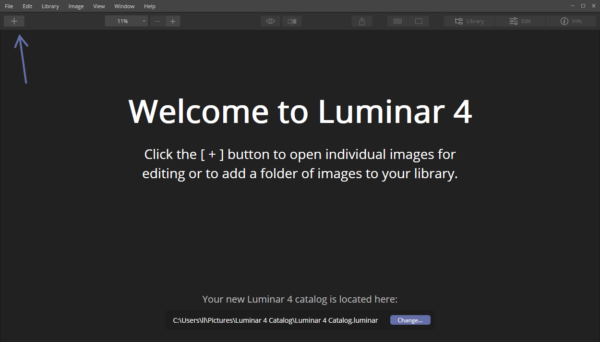
Import
You can add a single image or add a folder of images for editing. Also, you can set rating, color label or flag for imported photos to easily find a photo. All imported photos will display thumbnails on the left.
Luminar supports importing various image formats, including Raw (CR2, NEF, DNG, ARW, etc.) and common images (JPEG, PNG, TIFF, PSD, BMP, etc), meeting all your needs to edit on a photo.
Photo Editing
Luminar offers 4 photo editing modes: Essentials, Creative, Portrait and Professional.
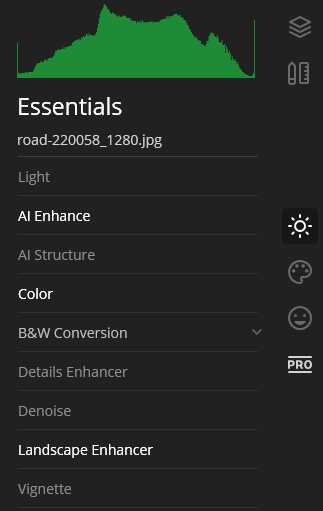
- Essentials Editing
Under Essentials editing mode, all the most-frequently used editing tools are put in one place.
You can adjust light and color, denoise, apply B&W conversion and Vignette or utilize the Details or Landscape Enhancer.
These tools basically meet all the needs to edit most of your images. And the AI Enhance makes the photo editing even easier and faster, with one click, you can get photos with better quality.
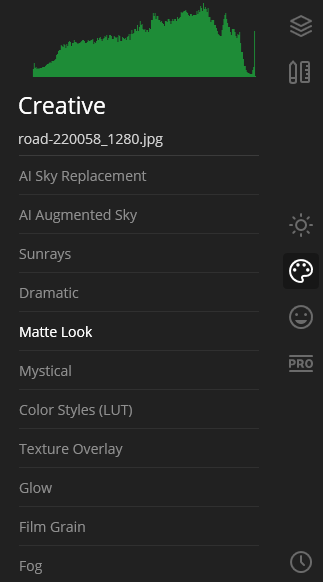
- Creative Editing
The creative editing mode gives more options on color and styles, it enables users to put their creativity onto their photos and present their innovative ideas. You can AI replace or augment the sky, add sunrays, glow, file grain, fog or texture overlay to your photos, or make your photos dramatic, Matte and mystical. Even, you can select different color sytles.
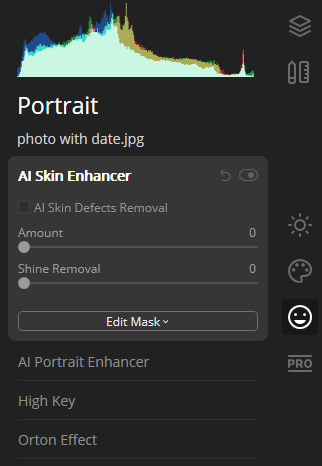
- Portrait Editing
This is used for portrait retouching. Luminar applies AI skin and portrait enhancement on a portrait photo, all what you need to do is manually adjust the parameters and preview the result
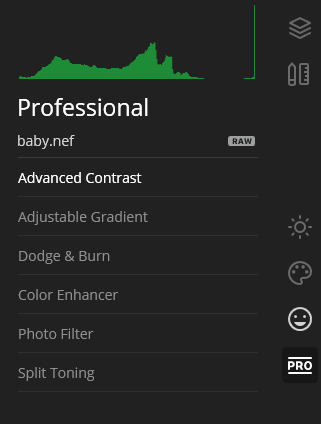
- Professional Editing
The Pro mode is used to enhance the details with precise controls on color and tone when the basic editing fail to bring you a desired result. There are tools for advanced contrast, adjustable gradient, dodge&burn, color enhancement, photo filter and split toning.
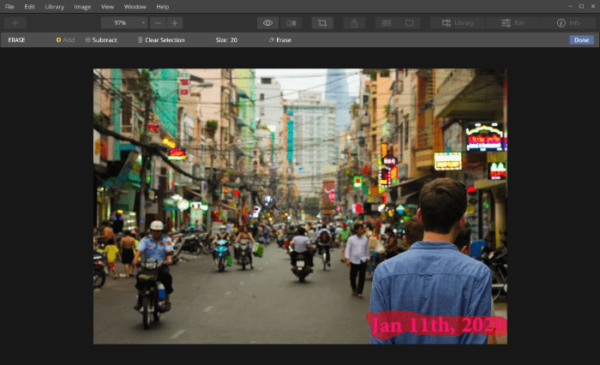
Canvas Tool
Personally, I like its Canvas tools very much. It helps to correct distortions and remove unwanted objects from a photo. For example, you can remove a watermark or date stamp from a photo, even remove unwanted person or any object from a travel photo.
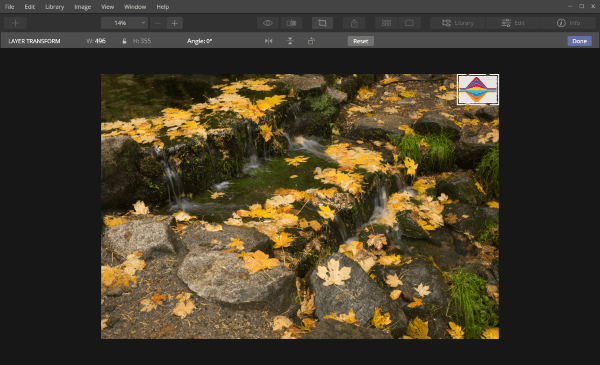
Layer Editing
In the case that you want to blend multiple elements into one photo, you can transfer the photo to a layer and edit or manage the layers then. With layer editing, you are able to add logo or watermark to photo easily.
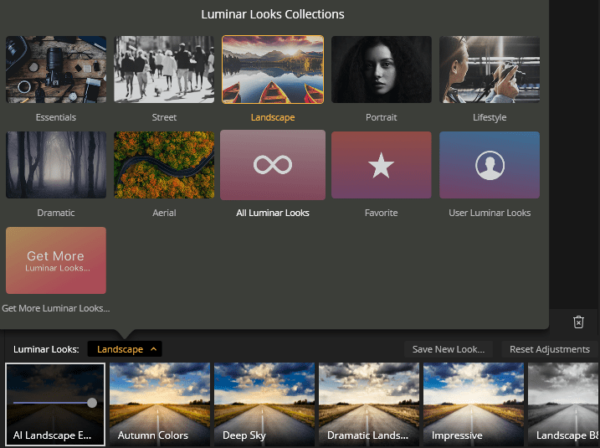
Luminar Looks
Luminar offers a wide range of effects for different types of photos, including street, landscape, portrait, lifestyle and so on. Also, you can purchase more Luminar looks from its marketplace.
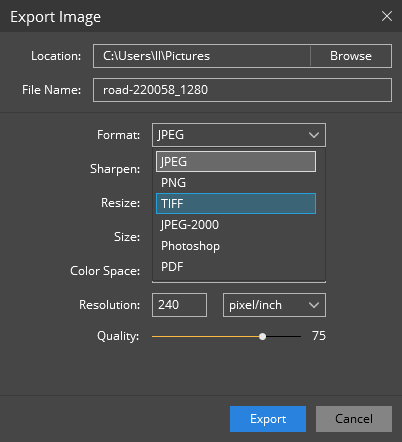
Sharing and Export
After all editing, you can directly share your photos to Mail, SmugMug, 500px, Facebook and Instagram.
Also, you can export your raw or other images as other common image formats: JPEG, PNG, TIFF, PDF and Photoshop.
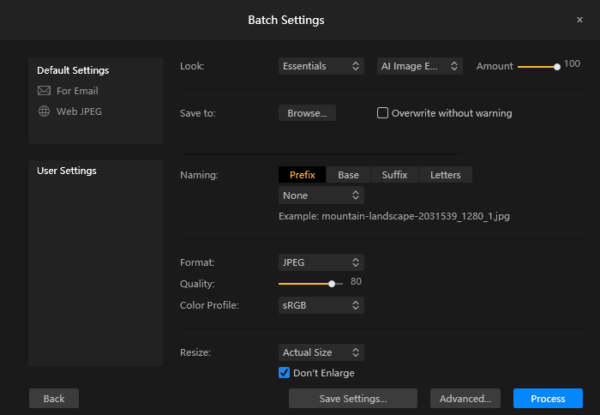
Bath Process
Another feature that you should never miss from Luminar its image batch processing. There is no need to worry about batch photo editing anymore, Luminar can batch process multiple images at the same time, apply effects, rename, export, select quality and resize.
Tech Support
Luminar has a wonderful tech support team, preparing themselves at anytime for your assistance. It is true that Luminar is easy to start with, but if you want to master all the advanced photo editing skills, you may need tutorial. Luminar offers tutorials both in document and YouTube video, so that we can sweat hard enough on this program.
Our Review
Summary:
Unlike other photo editing programs, Luminar is AI powered, all the basic photo editing can be done with its AI technology automatically and smartly, and the results come out excellent, this is why Luminar is easy to start with. But still, it provides advanced editing tools to have precise controls on the color, light, contrast, styles and so on. In addition, its batch processing feature makes photo editing become highly efficient, photo editing is no longer a one-by-one job anymore.
The Good
- Offer features from Basics to Pro
- AI enhance photos
- 4 editing modes for different needs: Essentials, Creative, Portrait, Professional
- Edit photos creatively: replace sky, augment sky, add sunrays, etc.
- Canvas tools are offered to correct, recompose and remove objects from photos
- Edit photos as layers and can be easily managed
- Exquisite Luminar Looks for different types of photos
- Share and export photos in 6 formats
- Batch process images: resize, rename, export, etc.
- Excellent customer service
The Bad
- Take large space
- The installation and editing process takes time
Luminar VS Adobe Lightroom
Both working as a photo editor, Adobe Lightroom is standing on the top of this world, while Luminar is on its way getting closer and closer to the top. So, here comes the questions, Luminar VS Adobe Lightroom, which one is better.
It is hard to answer this question, since each has its advantages and disadvantages, which one is better is absolutely up to your photo editing needs. If you want to have an easy start and edit creative photos (replace sky, add sunrays, apply different looks) to your photos, Luminar is a better choice. But if you work more on basic and detailed editing on photos, like to have a precise control on all details, you’d better use Lightroom. Follow comparison table will give you some clue on their difference and help you with your final decision. Whatever your choice is, you are always recommend to have try on their free trial before paying.
| Luminar 4 | Adobe Lightroom | |
|---|---|---|
| Easy to use | Yes | No |
| AI powered | Yes | No |
| Creative tools (Sky replacement, sunray, etc) | Yes | No |
| Lens & Geometry | Basic | Advanced |
| Work with layers | Allowed | Not allowed |
| Masking capability | Full | Basic |
| Add DCP profiles | Yes | Yes |
| Tethering | No | Yes |
| Create Slideshow | No | Yes |
| Printing preferences | No | Yes |
| Process speed | Medium | Fast |
| Import process | Fast | Formal and tedious |
| Export options | Location, file name, format, sharpen, resize, color space, resolution, quality | Location, rename, resize, sharpen, metadata, watermark, post process, quality, color space, etc. |
| Update | Not regular | Monthly |
| Library module options | Basic | Basic and Advanced |
| Mac and Windows version | A bit different (Mac has more features) | Identical |
| Pricing Structure | 1 Payment for Lifetime ($67) | Monthly subscription ($9.99) |
Luminar VS Lightroom, which one you are and will use for photo editing?